3. Macro recording
Home | << Previous Page | Next Page >>
Learning Objectives
- Recording with the Recorder tool
- Building macros using the Recorder output
- Beginning to code in ImageJ
The Recorder Tool
Most processes in ImageJ can be recorded, enabling the fast and simple construction of code to automate analysis or image processing pipelines.
Let's try automating some of the processes we've already covered as an example.
Exercise 1: Using the Recorder
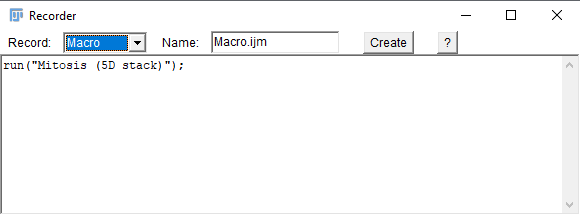
- Open the Recorder
- Plugins > Macros > Record
- Open the Mitosis image we used previously in our figure ("Mitosis (5D stack)")
- See that some text has appeared in the recorder. This is code documenting your actions. This is code documenting your actions.
- By defauly the ImageJ Macro lannguage (simply called "Macro" here) is used. But the recorder will also produce records in other languages
- Have a look in the "Record:" drop down menu
- You can create a script directly from the Recorder by clicking "Create". This will be given the title present in the "Name:" text box
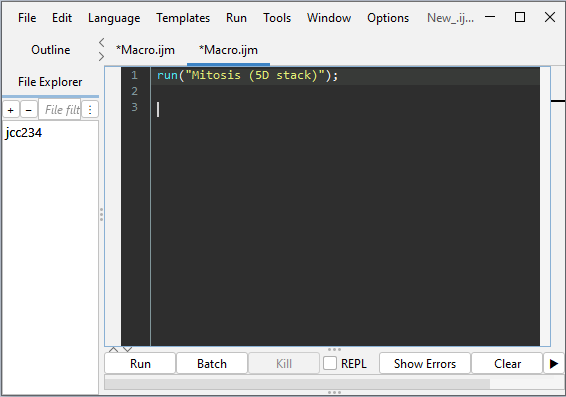
- You can also open new scripts by File > New > Script Note: It is possible to write code in ImageJ using even more languages. For your code to work, make sure the correct language is selected in the "Language" tab. For our current purposes we'll stick with ImageJ Macro


- Scripts can be run by clicking "Run" or pressing Ctrl+R
- Close the Mitosis image and try running the code you've recorded
- This should reopen your image
Exercise 2: Building a script with the Recorder
Here we're going to try automate the construction of our figure from Page 2.
The only two parts of the process which required manual involvement were the adjustment of the image brightness and the selection of an ROI to crop the image.
It is possible to build manual intervention steps into a macro, but for simplicity we'll skip that step for now.
These were the steps. You can type the underlined commands into the search bar to find them again. Try to build a script to replicate this process:
- Open Mitosis (5D stack)
- Z Project...
- Duplicate frames 25-28
- Convert image type to RGB Color
- Stack to Images
- Select the first frame from the separated stack
- Select the window with the cursor, or by Window > MAX_mitosis-1-0001
- Add Scale bar
- Flatten the scale bar onto the image
Your code should look something like this:
run("Z Project...", "projection=[Max Intensity] all");
run("Duplicate...", "duplicate frames=25-28");
run("RGB Color", "frames");
run("Stack to Images");
selectWindow("MAX_mitosis-1-0001");
run("Scale Bar...", "width=5 height=7 thickness=2 font=14 color=White background=None location=[Lower Right] horizontal bold hide overlay");
run("Flatten");run("Mitosis (5D stack)");
Being a human, it can be difficult to keep track of what all the steps of a program are for. Particularly if they have been written by someone else!
It's good practice to write comments throughout the code, by preceedng text with // to annotate it.
You'll thank yourself later. E.g.
run("Mitosis (5D stack)"); //Open mitosis image
run("Z Project...", "projection=[Max Intensity] all"); //Maximum intensity projection to remove z-dimension
run("Duplicate...", "duplicate frames=25-28"); //Duplicate only frames 25-28 of the image
run("RGB Color", "frames"); //Convert image to RGB
run("Stack to Images"); //Separate stack to individual RGB images for each timeframe
selectWindow("MAX_mitosis-1-0001"); //Select the first image separated from the stack
run("Scale Bar...", "width=5 height=7 thickness=2 font=14 color=White background=None location=[Lower Right] horizontal bold hide overlay"); //Add scale bar
run("Flatten"); //Stamp scale bar on image//This script will open the stock image "mitosis (5D stack)" and process it to make images for a figure
Note: You can also select a block of text and press Ctrl+/ to comment or remove comment status. This is very useful if you want to temporarily remove a step in your pipeline
The script is working, but there are loads of other windows still open. This is messy and confusing.
When working manually you can close individual windows with the shotcut Ctrl+W or close all open windows with Ctrl+Shift+W.
To tidy up our script we can close the unwanted windows by adding close("mitosis.tif") ;close("MAX_mitosis.tif") ;close("MAX_mitosis-1-0001") ; //close unwanted images
Let's get coding!
Congratulations you've just written a program in ImageJ :)
Easy isn't it?
Before going any further let's think about the basics of what is in your script:
- There are functions e.g. "run" or "selectWindow"
- And there are commands between brackets and quotation marks, providing details of that function
- Loads of functions exist. They will pop up in the script window as you begin typing and provide helpful guidance
- A library of built in functions also exists: https://imagej.nih.gov/ij/developer/macro/functions.html
- Finally, and importantly, there is a semicolon (;). This defines the end of a line and while easy to leave out, can cause a lot of issues in its absence.
Generally ImageJ deals with thee main data types:
- Numbers
- Can do maths with these
- Strings
- Defined between quotation marks ""
- These can be text or numeric, but are not treated like numbers and you can't do maths on them
- Note: The commands being used in our script were in quotation marks. These are strings!
- Arrays
- Lists of strings or numbers (or both)
- We'll think about these more later
Playing with strings
- Here we will write a string, which as well as a useful exercise, is a programming right of passage
- Open a new script (we'll keep working on the previous one in a minute)
- Type
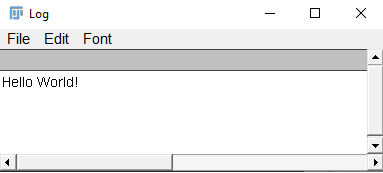
"Hello World!";into the script editor and run - This phrase will be displayed in the Log window (sometimes this becomes buried and needs to be found via Window > Log)
- You may often find it necessary to combine strings, this can be acheived by using
+, e.g."Hello" + " World!"; - This can be particularly useful when editing the strings which form commands within functions
- Information can also be stored as a variable for later use
- Here we provide an arbitrary reference name which can be e.g.
b=" World!";
c=a+b;
print(c);a="Hello";

Note: Once assigned to a variable, strings and numbers need to be printed out to view, using print()
Exercise 4: Putting string to work
- Return to your image processing script
- This is getting good, but currently we still need to save all the images at the end
- An alternative would be to set a directory to save into
- This can be done using
getDirectory. Type it into the script and look at the options which pop up - Variants of this function will provide the adress of specific directories used by ImageJ, apart from
getDirectory(string) - This allows the user to provide an address, and the string inside is simply a title given to the file browser opened
- Test it on its own in a new script e.g.
getDirectory("Select a directory"); - To make use of this function we need to record the address of the directory selected e.g.
dir=getDirectory("Select a directory"); - Try this out and use
print(dir);to check it's worked


saveAs("tiff", path);, where "path" is a string of the address- You will need to select each image in turn
- Then run the
saveAsfunction described, combiningdirto a filename of your choosing which must end ".tif" e.g.saveAs("tiff", - Try to work out how to do this on your own. If you're confused, look here for some help
Home | << Previous Page | Next Page >>